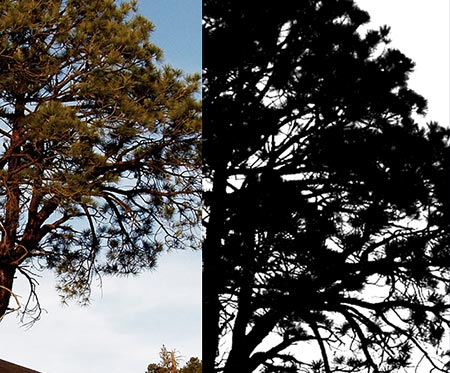
 One of the most difficult things to mask in Photoshop is a tree. All those tiny branches and leaves make it obscenely difficult to remove the sky in the background, to say the least. Phong has a great little tutorial on masking a tree in a photo when there is a sky background. The tutorial will demonstrate how to extract a clean mask from the tree photo, using channels and levels.
Masking pesky trees in Photoshop
Finding the exact center of your Photoshop document
In Photoshop you may find yourself trying to locate the exact center of a document by using a select all and dragging guides to line up with the handle points. This method works, but is tedious. Instead, use the View>New Guide menu item and use 50% as the horizontal and verticle locations in the New Guide dialog box.
Save InDesign page palette space & scrolling
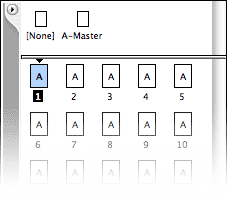
 Did you know you can save yourself some scrolling and screen space with InDesign’s Pages Palette? If you’re like me, you’re constantly moving between pages in long documents. ID’s default is to display the page icons in the Page palette vertically. This makes for a lot of scrolling and takes up more screen space to see more than just a few pages at a time. You can choose Palette Options from the Pages palette’s pop-up menu and de-select the Show Vertically check boxes for Pages and Masters panes.
InDesign preferences that “stick”
Were you aware that most of the preferences/options you set in dialog boxes for tools & palettes only stick with the document you have open at the time? Try opening Adobe InDesign without actually having a document open and set some tool/menu/palette preferences. The choices you make with no document open should stick through program and computer restarts. I find this particularly useful because I set up several custom colors in the Swatches palette for each client. By doing it with no document open, they are always available when I create a new document. I also set up a specific style sheets and a few other minor adjustments… all which apply to every document I open.
Quick blend mode changing in Photoshop
 If you like using various Blend Modes in Photoshop when using different painting or retouching tools, you’ll love this little shortcut. Hit Shift + (plus) or Shift - (minus) to cycle through the different blend modes in the control bar. What I really love about this option is that you can adjust the blend modes on a stroke-by-stroke basis, rather than a layer-by-layer basis. Speaking of layers, you can change the Blend Mode of an entire layer if you have the Move Tool (the solid black arrow tool) selected, the same key commands change the layer Blend Mode.
Don’t crop your Photoshop image, Trim it
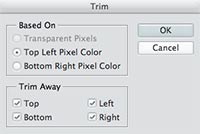
 After scanning line art, and sometimes after working with illustrations, you’re left with unwanted white space around your subject matter. Accurately cropping it out can be tedious and timeconsuming, or you can use Image>Trim in Photoshop. The Trim dialog box offers a few handy settings you can customize. As long as the area you want to remove is either transparent or a solid color, Trim will instantly crop the canvas down to exactly where the illustration begins.
Position your Photoshop drop shadows visually
Did you know that there’s an easy way to get your Photoshop Drop Shadows right where you want them? Normally you would enter some coordinates into the Drop Shadow layer style dialog, then delete them or edit them again and again until you found just the right position for the shadows. It’s much easier to just drag the shadow around in the little preview window while the dialog box is open. The coordinate numbers will adjust to reflect your movements. This tip also works with Inner Shadows. While we’re at it, you can drag textures and patterns around in the Bevels style dialog, Satin style dialog and Pattern Overlay style dialog.
Adjust an existing InDesign color the easy way
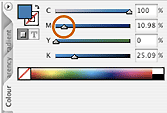
Here’s an interesting tip Change One – Change All posted about InDesign that I didn’t know about, though I wish I did sooner.  When you apply a CMYK color to text or an object in your InDesign document and decide that you want to make it a little darker or lighter, you normally would have to create a new color and adjust your CMYK percentages to get what you want – a timely task. It’s much easier to just select your color in the color palette and hold down the Shift key and move one of the sliders. The other three sliders will adjust accordingly along with it to give you your new color.

