 If you’ve read this site for any amount of time, you know I love Photoshop brushes, especially grunge-style brushes. Today I came across two sets of grunge brushes by Aramisdream, and they’re spectacular. Download set one here. Download set two here. Uncompress the downloaded files and move the .abr files to your Photoshop/Presets/Brushes folder. Then load them into your brushes panel in Photoshop to use. They’re all large, high-quality brushes and make perfect background textures for various projects.
Category: Resources
1000+ Free Photoshop brushes
 Abduzeedo has put together a list of 1000+ Free Photoshop Brushes complete with download links in a variety of styles, including grunge, abstract, modern and vector. You can take a look at the preview images and download them here.
Yahoo offers free graphic stencils
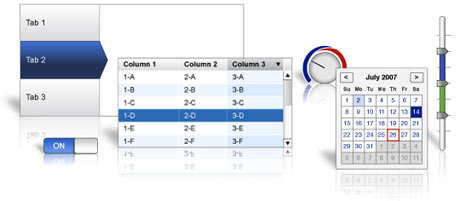 The Yahoo Developer’s Network has made available a free package of graphics stencils (templates) in Vector, PDF, PNG and OmniGaffle formats. Included in the package are templates for:
- Calendars
- Charts & Tables
- Control Elements
- Form Elements
- Menus & Buttons
- Mobile Phone Graphics
- OS Window Elements
- And more
You can download the package here.
Free vector art from Dezignus
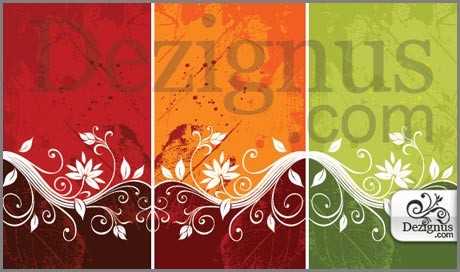 There’s no freebie like a vector freebie, I always say. Dezignus’ site is full of them, including this beautiful floral border design, as well as Simpsons characters, stars, flourishes, icons, and other border elements. Be sure to also check out the links to Photoshop brushes, tutorials and inspirational material while you’re there.
Create a rotatable globe in Illustrator
 Chris over at Blog.SpoonGraphics has posted a great little tutorial on how to create a rotatable globe in Illustrator using the 3D tools Adobe built-in to Illustrator. The tutorial yields great results. But let’s face it, how often do you need to create a globe? OK, you’re right, not often. But take what you learn and apply it to other objects that fit within your design ideas.
Free image templates for identity design
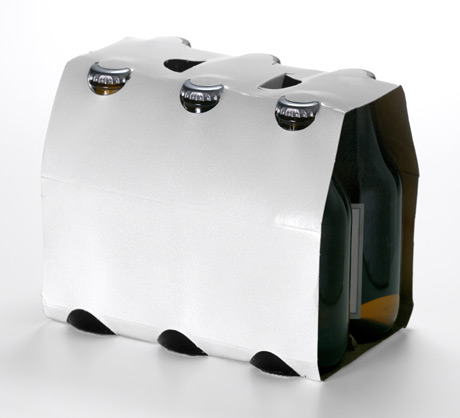 Among the numerous resources that can be found over at CreativeBits are a set of image templates for identity design. These “blanks” are perfect for showing off your design ideas to clients. There are around 200 images in 5 different categories available. The downloads are broken up by category and are anywhere between 7 and 17MB each. You can download the templates here. The download links for each category are below the photos.
Creating chrome text in Photoshop
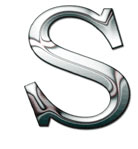 One of the more popular text effects to use in Adobe Photoshop is chrome text. You can search for hours to find the perfect Layer Style to make your job easy, but you may never find it. Instead, try this Metal Text Tutorial over at PSGallery.co.uk. The tutorial is easy to follow and can produce fantastic results with a little experimentation. From personal experience, I’ve found that your results will vary widely depending on the font you choose to use. Some areas to play with are the bevel settings and variations. While the tutorial does give you exact settings to use, you will most likely find that they don’t produce the desired effect on all fonts. Play around with them to get it to look the way you want.
Converting images from color to black and white in Photoshop
There are many ways to convert an image from color to black & white in Adobe Photoshop. I’ve posted tips before about this, but with Photoshop CS3, there’s a dead-simple way to do it that produces great results, and offers you the ability to fine-tune your conversion. 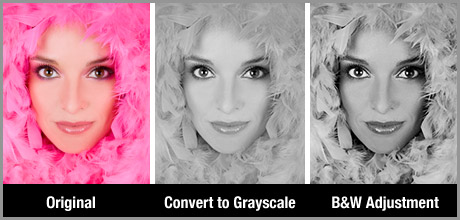 Instead of simply selecting Image>Grayscale to convert your image to B&W, select Image>Adjustments>Black&White (Command + Option + Shift + B for you keyboard shortcut junkies). In the resulting Black and White conversion dialog box, you’ll be presented with the opportunity to adjust various colors in the conversion process. If you’re familiar with how this works, you can adjust how each color in your image converts to gray. If that’s a little more work than you wish to do, you can simply click on the image and move your cursor around to have Photoshop automatically adjust your image based on the sampled color. As you can see in the image above, the normal Convert to Grayscale method produces a flat and quite dull image. Though this may work for some images, using the Black and White Adjustment allows you to to fine-tune your conversion to give you more contrast and retain more details in the image.
Fast and easy facial retouching Photoshop tutorial
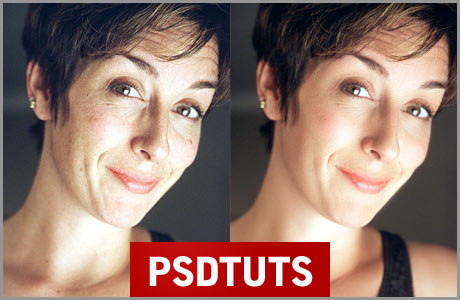 PSDTuts has a spectacular tutorial titled Super Fast and Easy Facial Retouching. There are plenty of these tuts floating around, but this one is particularly easy and highly adaptable. Plus, it includes a link to a downloadable preset for Photoshop’s Curves dialog box that produces stunning color adjustment with little to no work on your end.
How to add photorealistic perspective to your design
 Sometimes, flat just doesn’t cut it, and we need to find other, more attractive ways to present designs to our customers. One technique I’ve been using recently works remarkably well for text, logos and other vector artwork. It consists of taking a virtual photograph of the work by combining Adobe Illustrator and Photoshop filters. The dramatic end result can’t be distinguished from a real photograph. This tutorial from FontShop starts you out in Adobe Illustrator and finishes off with some adjustments in Adobe Photoshop using a few built-in filters. It’s quite easy, and produces dramatic results, as seen in the image above.
