 If you’re frustrated with the tiny size of the color ramp area in Photoshop’s built-in Color panel (as seen in the screenshot at the right), you’ll find some much-welcomed relief in Anastasiy’s (a talented Adobe developer) new SWF panel, available for download here. The Color Picker from Anastasiy (available for Adobe Photoshop CS4 only) adds a new, much more useful color picker, at a much larger size (as seen below).
  You can get the same thing in Photoshop without this new tool, but it requires a trip to a dialog box. By using this Color Picker, the tool is available from a regular panel via a click of the icon. To install the new Color Picker, expand the zip file and drop the resulting colorpicker folder into your Adobe Photoshop CS4/plug-Ins/Panels directory. To activate the Color Picker, go to your Photoshop menubar and select Window>Extensions>Color Picker.
Vignetting an image is a way of highlighting a subject in the image by making the edges of the image darker or lighter. There are more than a few ways to add a vignette to an image in Adobe Photoshop, but by far the easiest way is to use the built-in Lens Correction tool. Step 1: Start by opening your image in Photoshop. An image with the subject in or close to the center works best, but isn’t necessary.

Image before vignette
 Some people have waaaay too much time on their hands! Or you could say, they have way too much Photoshop talent. I ran this article back in 2006 on my previous blog, but thought it was worth revisiting. Bert Monroy, a digital artist, has composed what is claimed to be the largest Photoshop image known to the public. A quick look at the above image doesn’t do it justice. Here are some specs for that image:
- The image size is 40 inches by 120 inches.
- The flattened file weighs in at 1.7 Gigabytes.
- It took eleven months (close to 2,000 hours) to create.
- The painting is comprised of close to fifty individual Photoshop files.
- Taking a cumulative total of all the files, the overall image contains over 15,000 layers.
- Over 500 alpha channels were used for various effects.
- Over 250,000 paths make up the multitude of shapes throughout the scene.
 Most of the basic shapes and the Chicago skyline were created in Illustrator and brought into Photoshop for the final touch. The attention to detail is just staggering, as seen in the image at right. When you consider that the zoomed in image at right is such a tiny portion of the overall image above, it’s just an incredible amount of detail for something virtually nobody will see at first glance. Most designers and artists would have skipped such details in such a large image, but it goes to show you what attention to detail can do for your image, and your reputation. You can read more at bertmonroy.com – but be patient, the page WILL take a while to load.
![]() If you haven’t used Styles in Adobe Photoshop, you’re missing out on a simple way to add visual styles to objects quickly. If you have used them, the following tip may make applying them quicker. Rather than selecting the layer you want to apply the style to, then clicking the particular style from the Styles panel, try dragging the style from the Styles panel and dropping it on the object in your Photoshop document you wish to apply it to. Why is this quicker? Because you don’t have to worry about which layer is active. You can drag a style to anything on any layer, not just the current active layer.
If you haven’t used Styles in Adobe Photoshop, you’re missing out on a simple way to add visual styles to objects quickly. If you have used them, the following tip may make applying them quicker. Rather than selecting the layer you want to apply the style to, then clicking the particular style from the Styles panel, try dragging the style from the Styles panel and dropping it on the object in your Photoshop document you wish to apply it to. Why is this quicker? Because you don’t have to worry about which layer is active. You can drag a style to anything on any layer, not just the current active layer.
One of the coolest features Adobe ever added to Photoshop is the History panel. It allows you to be creative and not worry about losing previous work once you apply filters and tweaks. A little known feature is the ability to customize your history.  Click the fly-out menu from the top of the History panel and select History Options. From the dialog box that comes up you can adjust a few things that may make your History panel a little more useful.
 There are lots of ways to sharpen an image in Photoshop, and there’s really no right or wrong way. But there are better ways than others. I think you’ll find the following method to be interesting, and provide pretty good results.
  First, place a copy of the image on a second layer by hitting Command + J. Set the newly duplicated layer’s blending mode to Overlay. Now go to the menubar and select Filter>Other>High Pass. Use a starting value around 4 to 6. You can adjust the values to your liking.
 In my ever-present quest for more Photoshop brushes, I’ve come across a list of 50 free Photoshop brush sets from SixRevisions. The sets focus on modern design trends such as vintage, retro, swirls, and of course, grunge. Be sure to read the fine-print from the individual download pages, as some require attribution or have a non-commercial license.
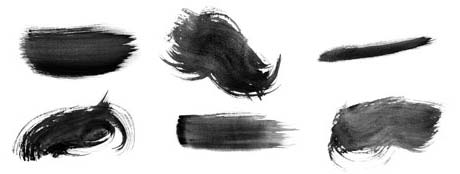
I recently provided a link to some great watercolor brushes for use in Adobe Illustrator. Today, I’ve found another set of brushes, this time for Adobe Photoshop.  SpoonGraphics has graciously provided this excellent super high resolution set of watercolor brushes, absolutely free. And keep an eye on SpoonGraphics, brush set 2 in on the way.


